There’s nothing more annoying than when the hose springs a leak. Of all the many things I want to spend my garden bucks on, hoses fall to the bottom of the list. The last thing I want to do is go buy a new one. Fortunately, they are easy and inexpensive to fix. Before you get started, know if you need a male or female connector. You don’t want to have to make more than one trip to the hardware store.
Here’s a step-by-step of the process:Step 1. Cut off the affected area. You can see that this hose has already been repaired once. In the spirit of recycling, I reused it when the hose sprung another leak. I use my lopers to easily cut through the hose.Step 2. Next, I remove the screws from the plastic clamp that keeps the hose end in place. Don’t lose the screws!The hardest part of the whole process is getting the repair kit hose connector out of the hose. I cut away at the outer sleeve of the hose, expose the rubber hose and cut that away as well.If you’re not reusing a repair kit, ignore this step and go strait to step 3. I use my trusty utility knife to do the cutting. Be careful and wear gloves so as not to inadvertently cut your hand.Step 3. Next, I pop off the hose connector and I’m ready to begin the repair, which will take no more than 2 or 3 minutes.Step 4. Take the small end of the black plastic connector, push it into the hose and screw the clamp back on. Word to the wise, make sure you have the screws turned tight.Step 5. Reattach the hose. Step 6. Voila! Back in business.
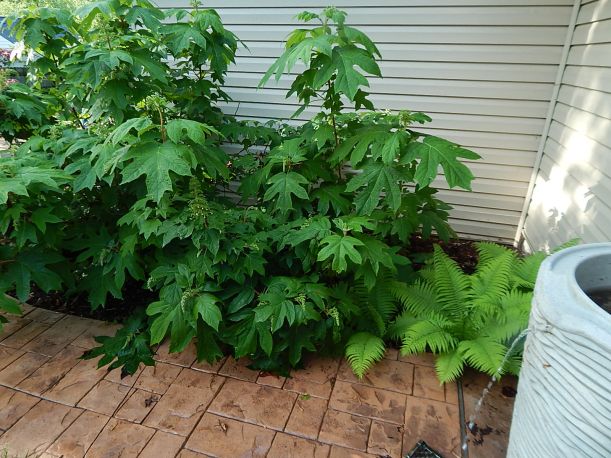
My oakleaf hydrangea, lush, laden with blooms and ready for a trim. Purple coneflower in front.
April showers did indeed bring May flowers to my Arch City garden. What a lovely month we’ve had; for the most part marked by relatively warm days and cool nights. Yet, as we wind our way through the month, the spring showers have not let up, and the forecast for early June in St. Louis looks pretty wet. (I just hope we don’t have a repeat of last year’s 19-inches of rain in June.) And true to form, our temperatures are on the rise as is the humidity and the frizz in my hair. What’s a girl to do?
Here’s an update of the garden.
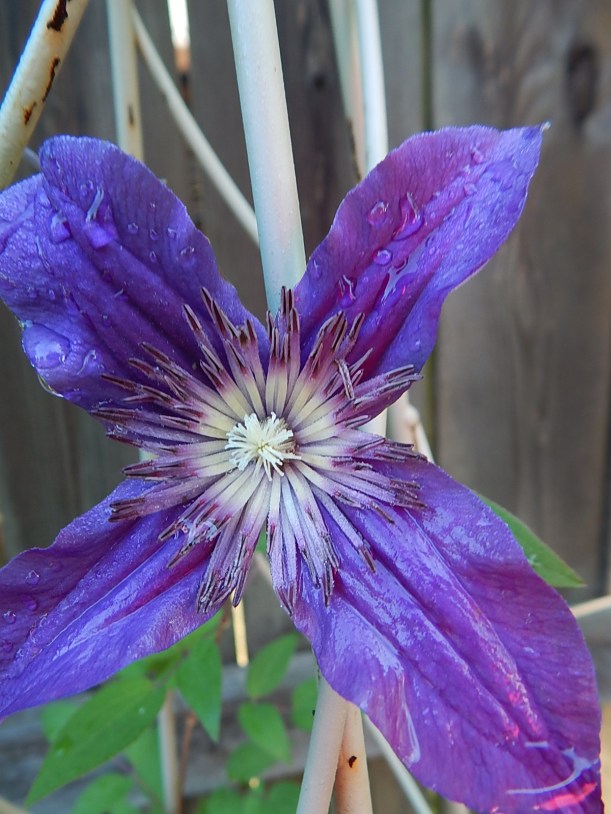
Clematis
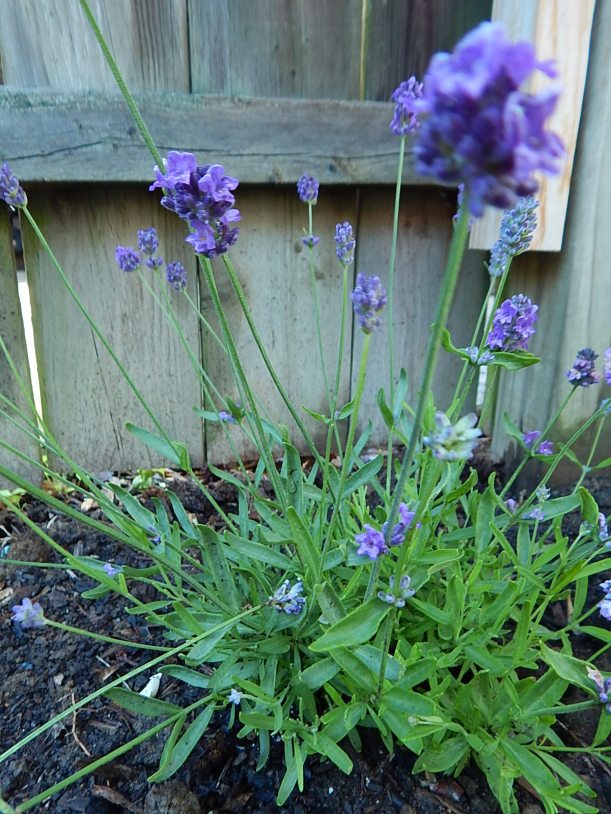
Keeping with the order of things, the purples bloomed first, strutting their stuff throughout the garden. Purple clematis, English lavendar, “Walkers Low” catmint, hardy geranium and “May Night” salvia sprang to life earlier in May. Electric-hued gomphrena, Mexican heather, tall garden phlox and Russian sage will provide purple accents throughout the rest of the growing season.
English lavendar is a new addition to the garden. I have planted one in a pot as well.
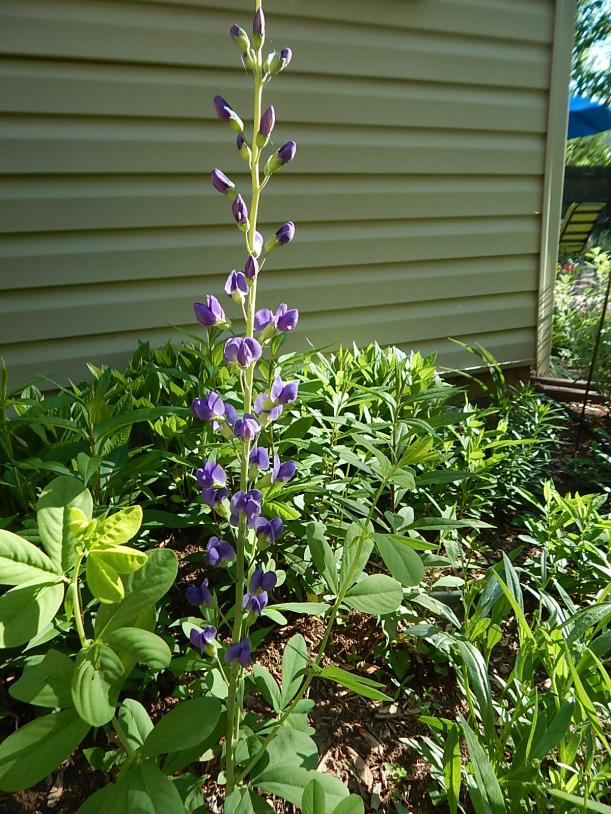
Baptisia australis is one of the first to bloom in May.
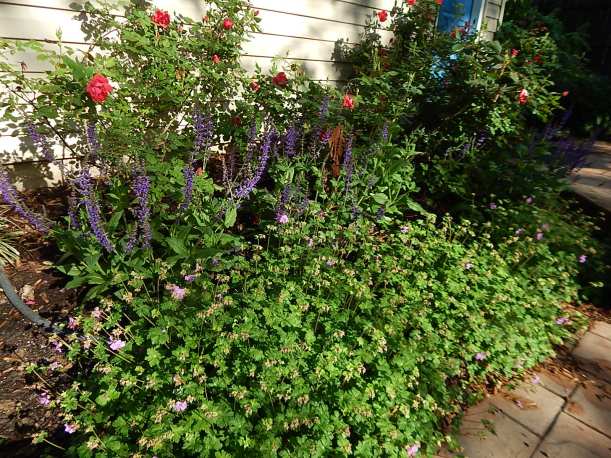
The first bloom of roses was really quite beautiful and fragrant. I just trimmed the spent blooms.
A lovely trio of radrazz roses, salvia and cranesbill.
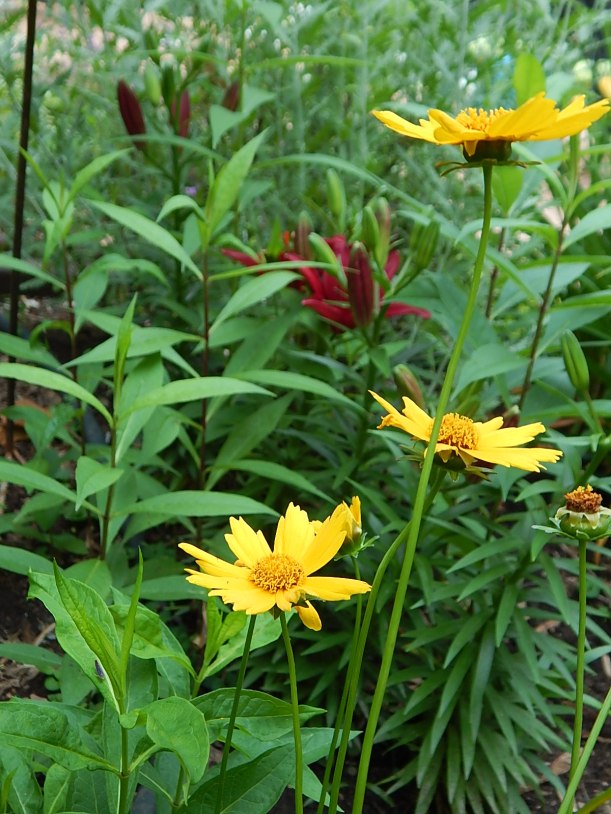
Out popped the yellows as the month marched on. Stella d’Oro daylily and coreopsis began to bloom.
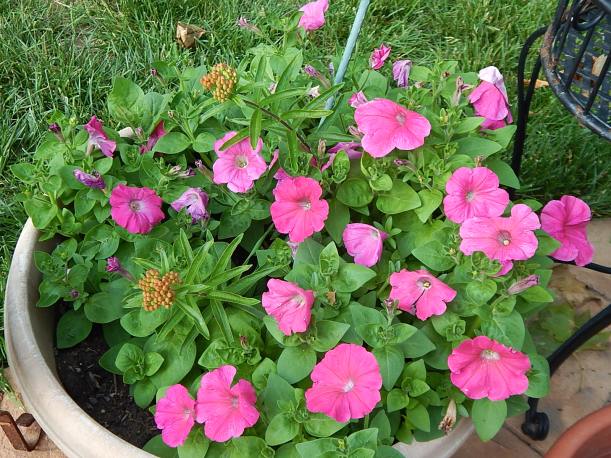
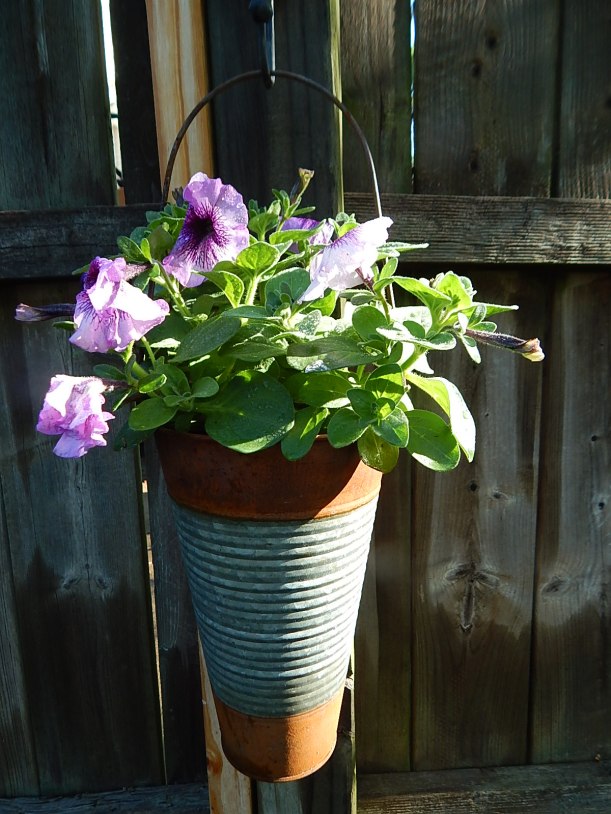
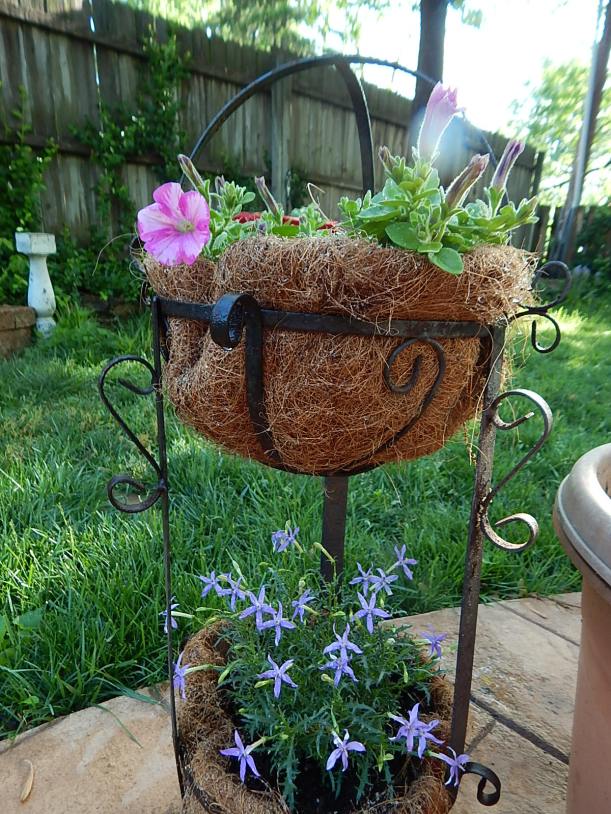
Petunias are a key feature to my containers this year. In fact, one container that held last year’s failed attempt at tomatoes is full with volunteer petunias from last year and volunteer butterfly milkweed.
I was wondering what to plant in this large container. The volunteers tood care of that decision.
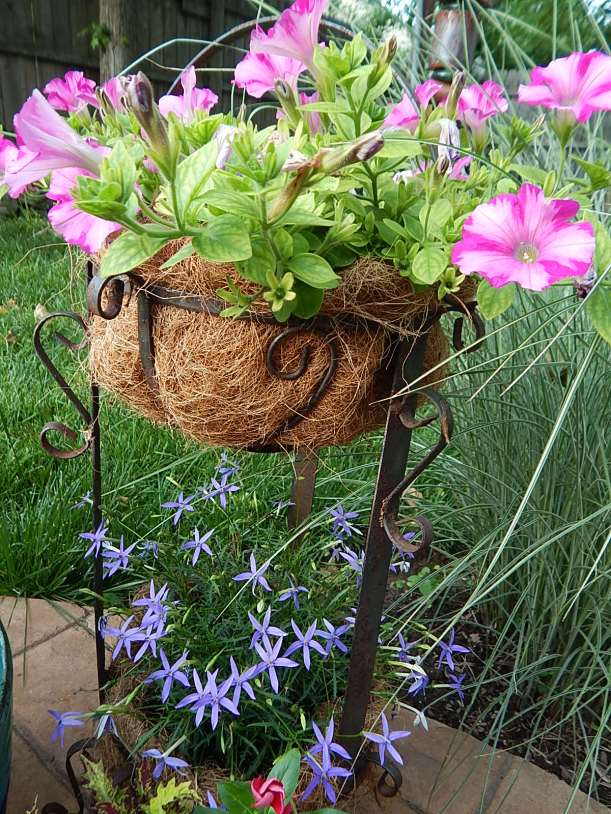
Supertunia “Raspberry Blast” on top and “Blue Star” Laurentia axillaris on the bottom.
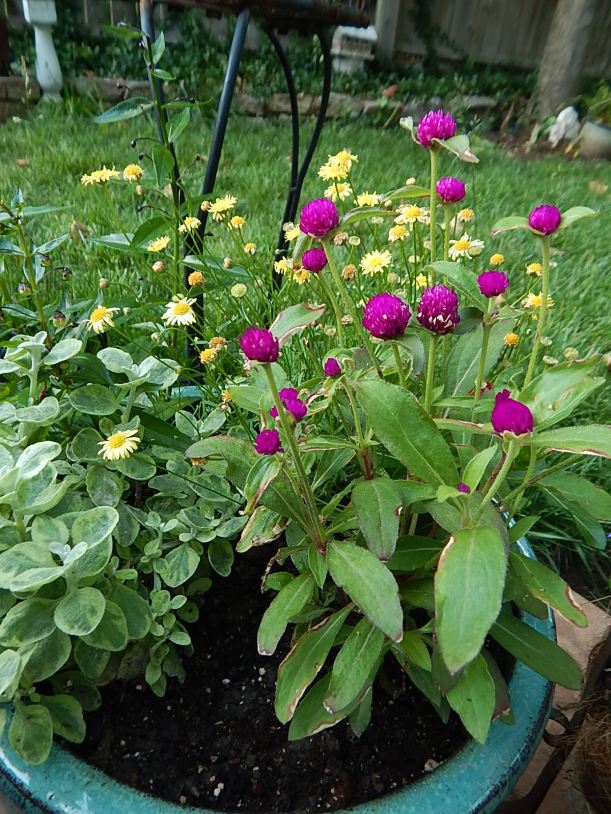
A combination container of gomphrena, yellow Surdaisy, cherry red angelonia and licorice plant.
“Amelia” shasta daisy, ready to spring open…
…fully blooming a few days later.
My favorite season is coming to a close and I am hopeful summer’s sizzlers will be equally as thrilling. Gardening friends, I hope you’ve enjoyed spring’s bouty as much as I have.
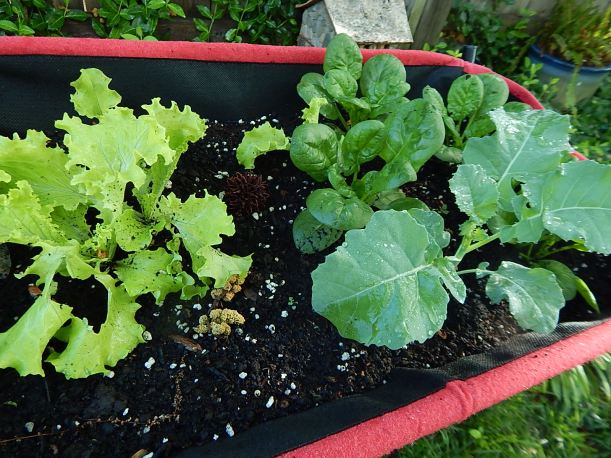
Lettuce, spinach and broccoli grow from seed in my veg trug.
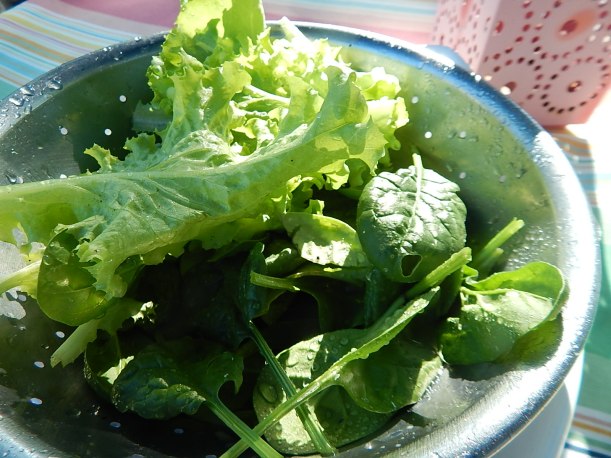
I’ve enjoyed my first home grown salad of the season. Tender lettuce and spinach leaves gingerly harvested from the veg trug. Truly a satisfying feeling. A salad that was fresh, delicious and grown from seed in my own backyard.
Yet I seriously doubt I will grow vegetables from seed again.
Freshly picked, washed and ready for tossing.
It’s not that I didn’t derive a great sense of accomplishment from harvesting my own salad fixins. I did! Honestly, though, I did not enjoy the growing-from-seed experience. I did two experiments: Starting seeds in eggshells (what I affectionately call The Pinterest Salad) and direct sowing seeds into my veg trug (what I call the No-Fuss-No-Muss Salad). And if I had to choose one over the other, I prefer the latter.
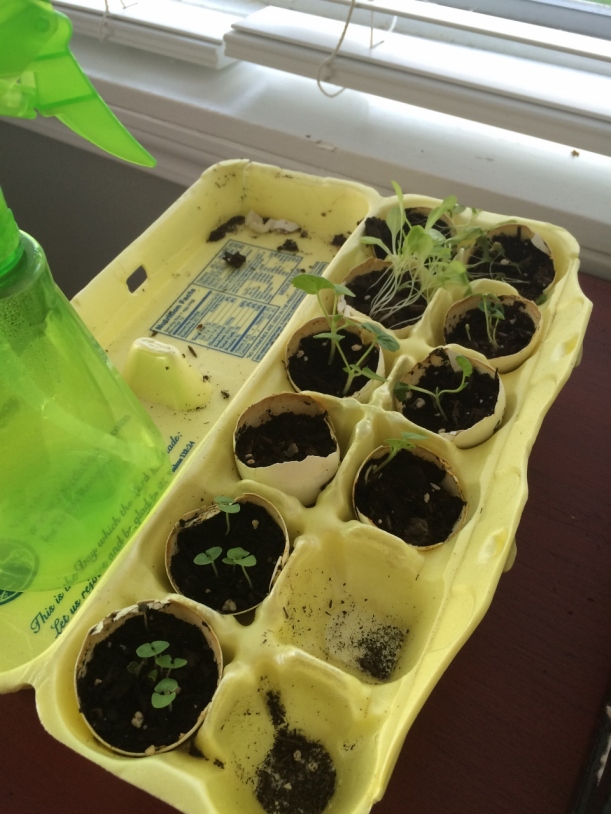
Daily I misted the eggshells and the seeds quickly began to sprout. Joyous, I envisioned gently positioning my eggshell seedlings into the trug beside the No-Fuss-No-Muss experiment. The race would be on! But wait, what’s this? My eggshell seedlings became…leggy. Apparently my bright sunny window was not enough. I actually needed a grow light which would provide the appropriate light so that that lettuce would grow bushier.
Uh-oh.
Leggy lettuce, broccoli and pelargonium get their start in eggs shells.
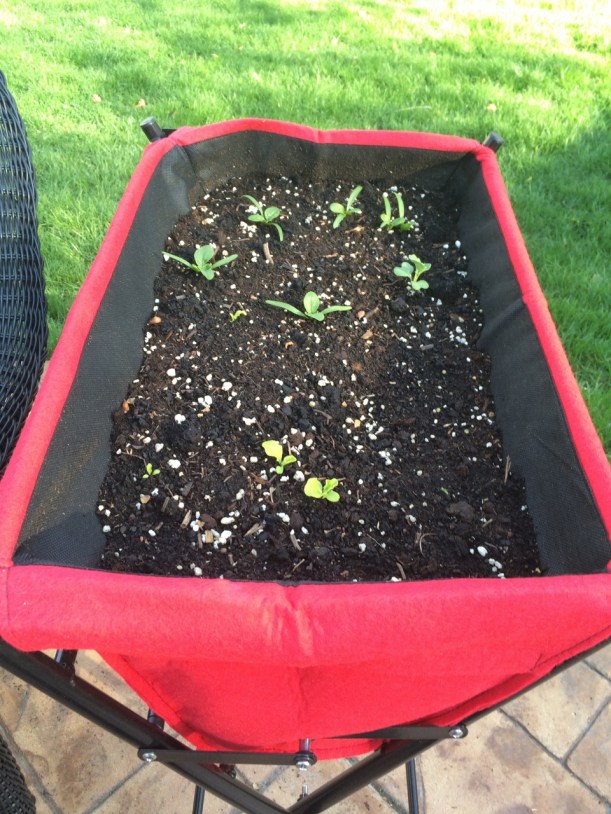
Meanwhile, the seeds in the trug were, well, trugging along. They were very slow to get going. Day after day little progress greeted my pre- and apres-work inspections. Was I watering enough? Too much? Not enough sun? Too cold? I moved that trug from sun to shade to partial sun/partial shade. Time would soon tell. Wouldn’t it? The broccoli plant looks wonderful but has yet to bear broccoli.
Direct sown into the veg trug, spinach and lettuce begin to sprout.
I decided this was too much anxiety for a salad. But patience saved the day and eventually the lettuce and spinach produced lovely leaves worthy of picking and drenching with salad dressing. It occurred to me that I should have written down the date I planted the seeds so that I could generally expect when they would mature. (I think I was looking out the window during science class.) The brocolli has yet to produce.
I continued to mist the Pinterest Salad. I had read that blowing a small fan near the seedlings would strengthen their stems. Whose got time for that! It’s no wonder I prefer the No-Muss-No Fuss method to salad gardening. I eventually took my Pinterest Salad outside and attempted to plant the eggshells in a small pot. That did not work. The shell fell apart and the seedling root structure was far to fragile.
Next year, I will fill my trug with salad fixins, but I plan to buy small starter plants from the nursery, which I expect will be equally satisfying.
I don’t talk about annuals much, preferring to invest in perennials and shrubs. But I do a bit of container planting each year to keep the color going. I’m anxious–but not too–for this cool, rainy spring to turn over to summer where the containers really take off. Every year I like to experiment with something new but I do have some tried and trues that I can’t live without. Here are five of my recent favorites.
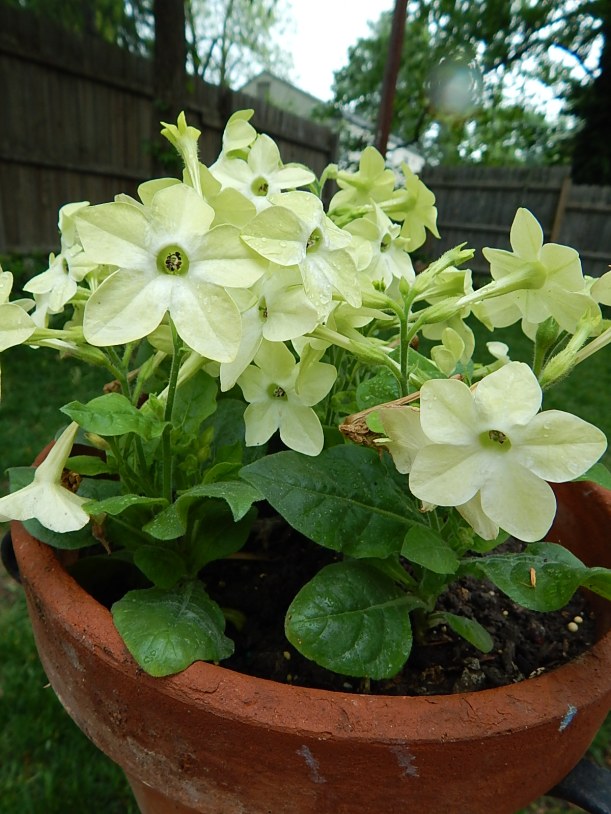
Nicotiana. I plant this near a window so I can enjoy its evening fragrance. A fast grower, nicotiana attracts bees and likes sun. Nicotiana comes in pink, a limey green and white. I like the white but have planted all three. I don’t usually combine this in a container because it likes as much room as it can get.
Begonia. Not just any begonia. It’s gotta be dragon wing begonia. The light my window boxes receive suits this plant just right, and dragon wing has become a staple. I usually pair them with a spiller because these plants are all the thriller I need! Here I’ve paired it with purple spiderwort, another easy grower. I’m partial to the coral blooms that gently cascade on a delicate stem. As you can see, they take over, but I’m not complaining.
Angelonia. I’m fairly new to this gem of a plant and I find the white cultivars are a bit more vigorous than the purple. However, I’ve only planted these in containers for two seasons and last season my containers (which had the purple variety) really didn’t perform well. This container had both white and purple varieties. I adored the yellow accent of calibrachoa, but it only bloomed once and looked pretty shabby.
\
Gerbera Daisy. Happy, hardy, colorful. A friend brought this over one day. I popped this sunny flower into a sunny yellow pot and enjoyed the heck out of it all summer. This is an easy care perennial that performed best in a container. It did not take well to being transplanted.
Gomphrena. I wish I had a better photo but you’ll get the idea. This is a real workhouse annual, providing bloom after tireless bloom all summer. Its cute pom-pom shaped spheres on long thin stems make for a great fill-in. I planted this last summer for the first time and combined it with sweet potato vine and petunias. I’d categorize this plant as fun, if there is such a plant category. The nearly neon purple bloom is a lot of fun too.
The marketers of the rain barrel say this is a good spot for a plant. I don’t think so. It would block the overflow hole (see picture below). Also the front has a lip of sorts to also allow rain to cascade down the front.
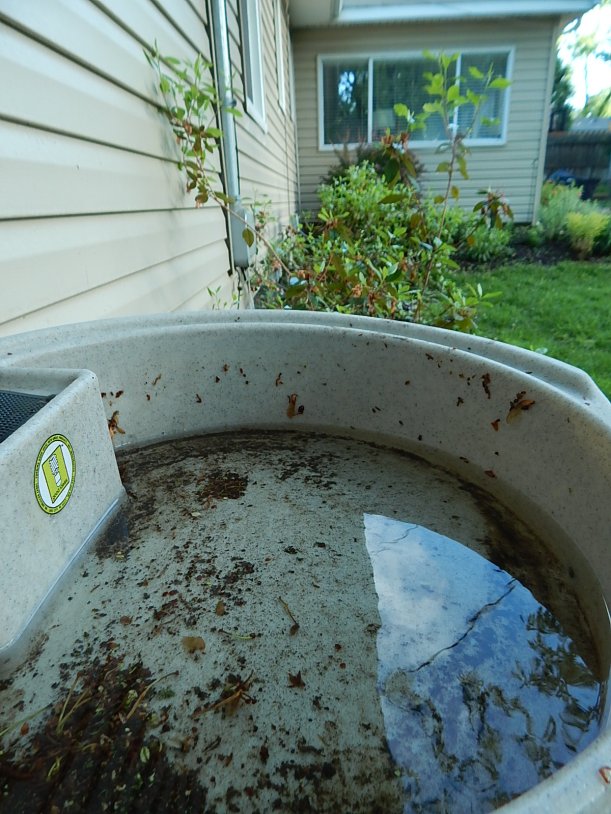
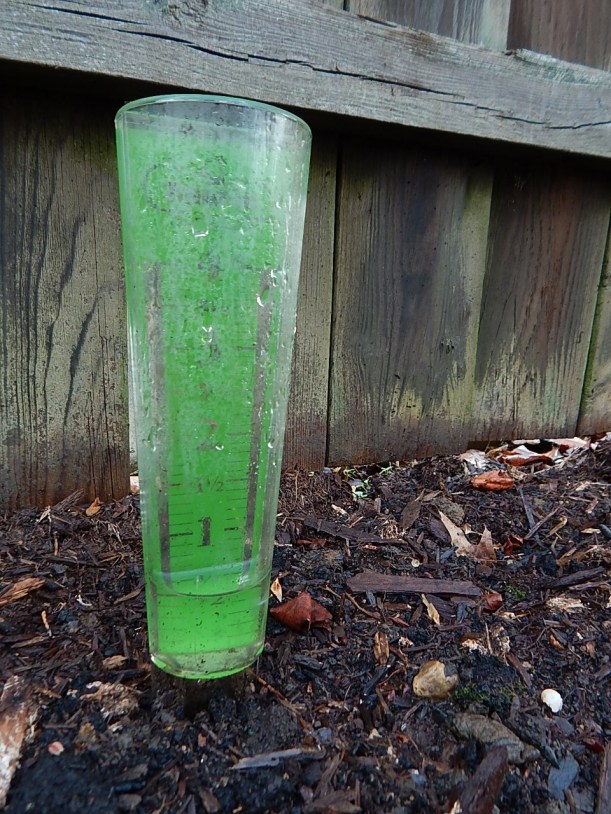
Here’s a rain barrel update. The water stinks.
In about one short month’s time, I have noticed that the water coming from each of the two barrels has an malodorous quality. There’s also a slight greenish/yellowish tinge to the water. This was not the case the first couple of weeks of use.
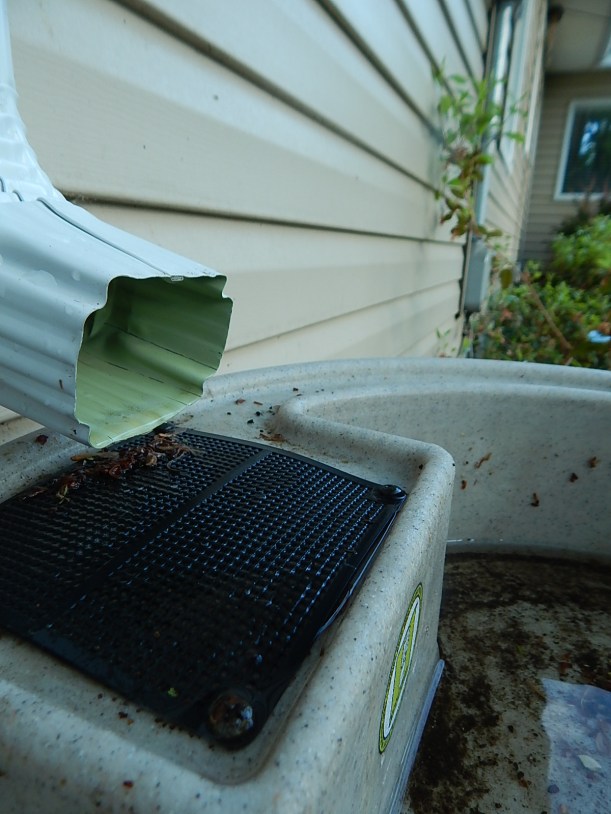
The barrel relieves itself of water when full. The lip at the top also releases water when full.
While I knew there’d be some maintenance needed, I didn’t think it would be so soon.The barrels have a small screen in the top where the water drains in. Other than that, the system is completely enclosed. There is no removable lid, which in hindsight may not be ideal for dealing with clean out issues. I do know that there is no critter in there and there is no leaf/treat/plant debris in there because the opening in the screen is too small.
It’s amazing the amount of debris that comes off the roof.
I immediately turned to the Internet for help in diagnosing this problem.Probably causes: pollen in the water, algae growing in the water. Apparently it is not uncommon for the barrels to take on an odor during the spring pollen season as the pollens are deposited in the barrel along with the rain. The common antidote seems to be to drain the rain barrels or to quickly use the water following a rain.
I’m not going to do that. Both remedies seem counterintuitive to having them in the first place. I don’t want to get rid of all that water I am capturing in an effort to keep it out of the sewer system. And, my garden doesn’t typically need to be watered right after it rains. Especially in the spring when the temperatures are mild.
Another common cause for stinky barrel syndrome, as I’ve decided to call it, is standing water at the bottom of the barrel. Obviously that is not my problem. My barrel has two spigots–one up high and one down low. The lower spigot is near the bottom so that should not be a problem as I get into the dog days of summer and am draining them to water my thirsty garden.
What to do? What to do? I needed to find a remedy for the smell before it became too awful. And there are lots of ideas out there. Add baking soda to the barrel. Add vinegar to the barrel. Add baking soda AND vinegar. Add bleach. Install the barrels in a shady spot (now you tell me!). Add cedar oil or cedar chips to the barrel.Use a commercial algae killer. And there are those who say leave it alone, the microorganisms in the water are good for the plants.
Further research poo-poo’d the vinegar idea, saying it will only make the problem worse. I decided to add 1/4 cup of bleach to the barrel. It seemed the quickest solution I have on hand. I have only taken a small amount of water from them since I did this because we’ve had lots of rain (about 2 inches this week) but I didn’t notice an odor. Is it because of the fresh water coming in and displacing the funky water or is it the bleach? Time will tell.
How do you keep stinky rain barrel syndrome in check?
This blog title pretty well describes my day yesterday. First, it was Friday. No explanation needed there. Even better, it was planting day.
A group of us at work have come together to plant a container garden outside the patio of one of the buildings. We’ve been planning this for quite some time and have had several meetings to discuss what we’d plant–veggies; when we’d plant–Earth Day; steps needed to take to get this done–get seeds, containers, soil, signs, building approval, watering schedule, weeding volunteers, etc.
As these things tend to go, one thing led to another. I’ve mentioned before that I work with seed and plant experts, so at sometime along the way (like Meeting One) we decided we needed their, ahem, “engagement” in this project. And by that I mean we went begging, asking for quality seed, assistance to grow out the seed and maybe even a little bit of agronomic support. We’d do the rest! Honest. Especially the planting on a Friday part.
“Engagement” wasn’t an issue. This small project taps right to the roots of the joys of gardening. Lots of us love to get our hands dirty; and are as passionate about home gardening as we are about farming. Even one volunteer brought everyone rosemary plants he started at home from seed. Kind of a party favor, if you will. And Nick, a marketing manager for Seminis Vegetable Seeds, was more than happy to provide seeds and supplies so we could showcase the products he is so proud of on campus.
Here’s the lineup of what we’ve got going on. Many are AAS selections. Maybe you’ve planted some of these seeds in your own vegetable gardens:
Tomatoes: Better Boy, Rugged Boy SV0056TD, Dixie Red
Cucumber: Gateway
Custard Beans
Eric, one of our planting experts, explained over lunch that our patio garden will have some challenges. The garden’s location gets lots of sun, which is good. It also will give off lots of heat retained by the patio. Fruiting plants like tomatoes will require lots of watering–even on weekends. And we’ll need to be coordinated in our watering schedule. We don’t want to drown the plants and we don’t want to overwater them either.
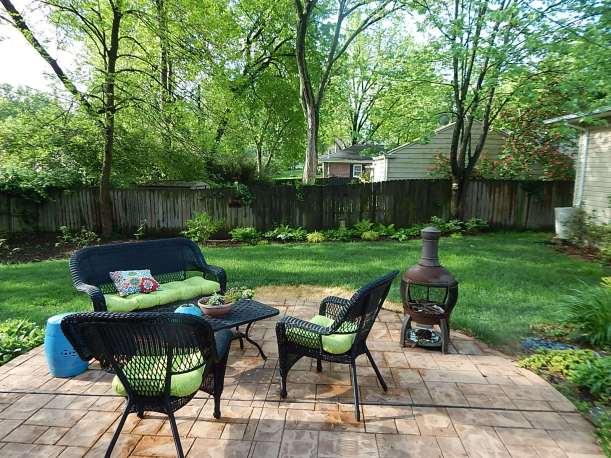
This is the patio bed before the plants were removed. It’s the perfect size for a container garden. Bonus: It gets tons of sun.
The cool season crops like broccoli, lettuce and spinach will soon be replaced by more peppers, zucchini and other warm season vegetables.
I did learn this tidbit: Water deeply to encourage the roots to reach down to the water. I’m guilty of watering too lightly. That encourages shallow root growth. I’ll be more mindful of that in my garden this summer.
And he explained that we’ll need to be on the watch out for leaf molds and fungus, as well as critters who enjoy the fruits of our labor. You’ve heard me complain about squirrels and rabbits. This garden will in all likelihood also include deer.
What started as lots of gardending enthusiasts thinking “Wouldn’t it be neat to have a garden at work?” has become a reality that turned into a really neat way to meet and know new colleagues. We have more in common than where we work. We all love to garden. I’m thinking we could have a plant swap down the road.
Does your office or company gardening opportunities?
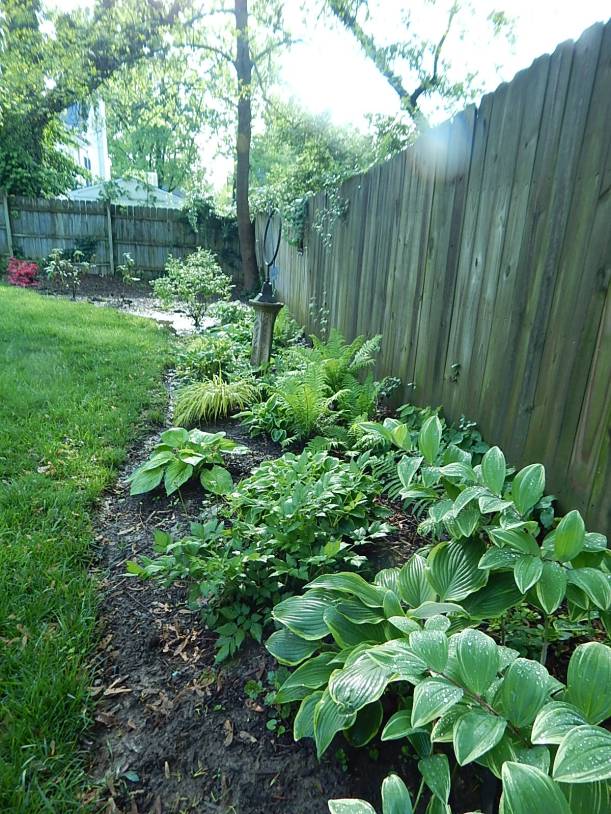
I’ve embarked on a garden improvement plan, but then what gardener hasn’t? Tired of struggling with the slow fill in of the big bed that runs the length of the patio, I decided it needed some help filling in and plants weren’t going to do it.
Rabbits have gotten fat off of hearty helpings of the liriope planted in a ring around the Japanese maple. And not just this year. They’ve been munching on the liriope since they discovered them in 2013. Enough! No longer an enabler, I dug them up and gave them to a friend. They don’t bother the liriope planted up near the house but I think they’re too afraid to get near the door.
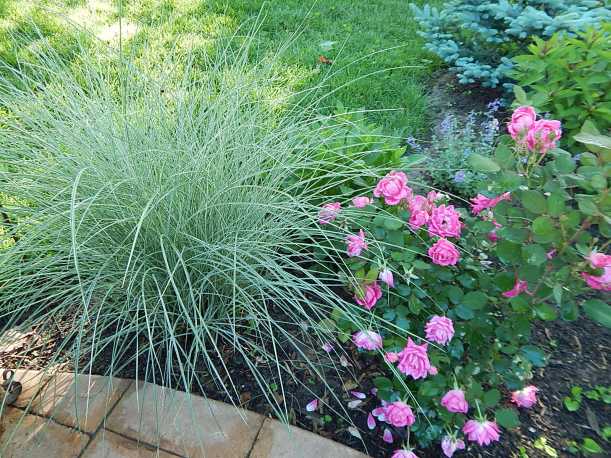
The growing maple cast too much shade on the zebra grass planted in the back of the bed. It is now positioned in front of the tree where there’s more sun throughout the day. Haphazardly planted daylilies (a gift from my neighbor) have been moved together for a more cohesive look.
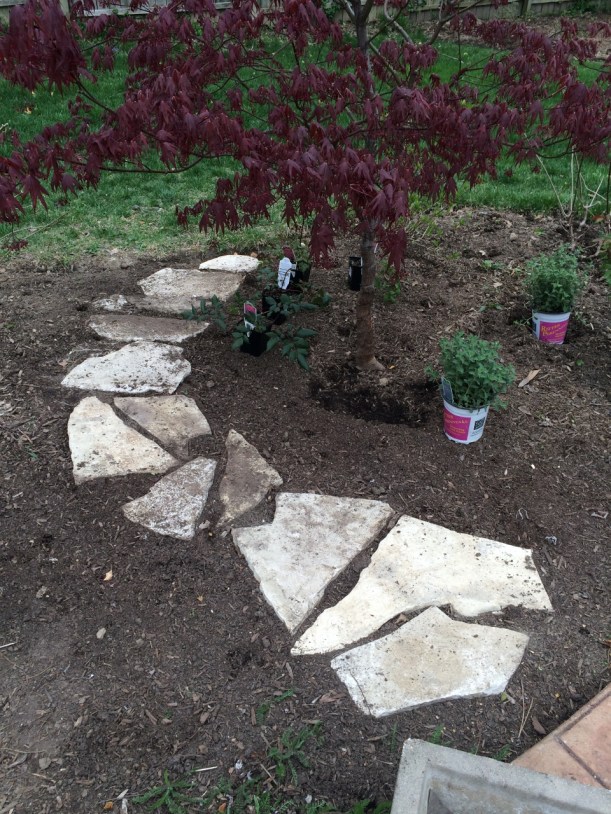
Suddenly I was left with lots of space around the tree. And I discovered two flagstone castoffs in the back of the yard. Well, you know the rest of the story. A quick trip to the nearby materials supply store and I was off to the races. Fortunately the ground is still soft and the soil is pretty good–not the rock hard, compacted clay I encountered when I started this bed in 2012.
“Walkers Low” catmint (Nepeta recemosa), “Maggie Daley” astilbe and “Amethyst” astilbe x arendsii, and lady’s mantle (alchemilla mollis) will find a home in the bed alongside roses, coneflower (echinacea), liatris, coreoposis, dianthus, “Little Joe” pye weed (eupatorium) and black eyed susans (rudbeckia) that are planted among the Little Lamb and Little Lime hydrangea.
Here’s a picture of the path before the flagstone was dug into place. (As a side note, I can’t believe how much the maple has leafed out in the past week. I love its dark maroon leaves.)
I moved those suckers into several arrangements before deciding on this layout. Their heft is deceptive; the materials guy told me in total they weighed more than 225 pounds.
The addition of a couple of rain barrels, my great vegetable experiment and–coming soon!–the addition of a paperbark maple have also filled my weekends. Stay tuned for upcoming posts on these adventures.
Here’s a quick peek at the goings on in my Arch City backyard. So happy it’s spring!
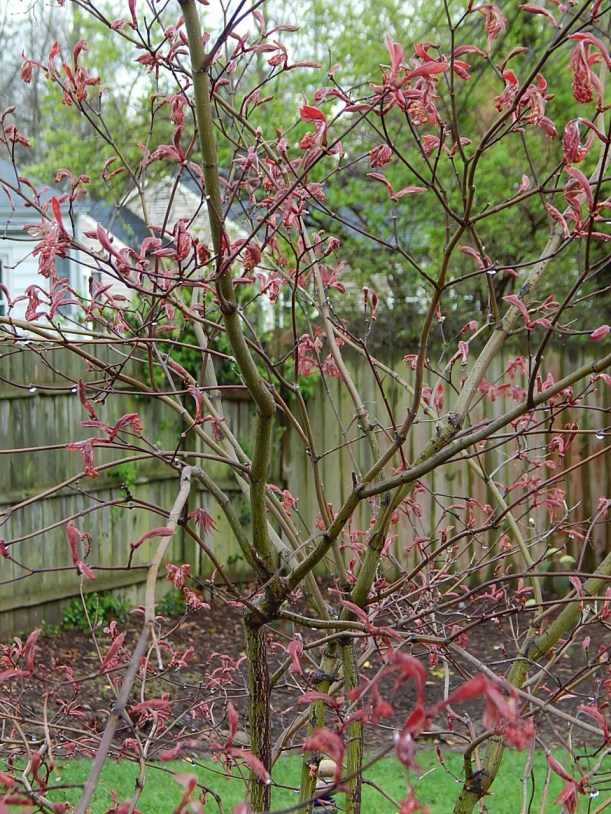
Bloodgood Japanese maple (Acer palmatum) starts to leaf.
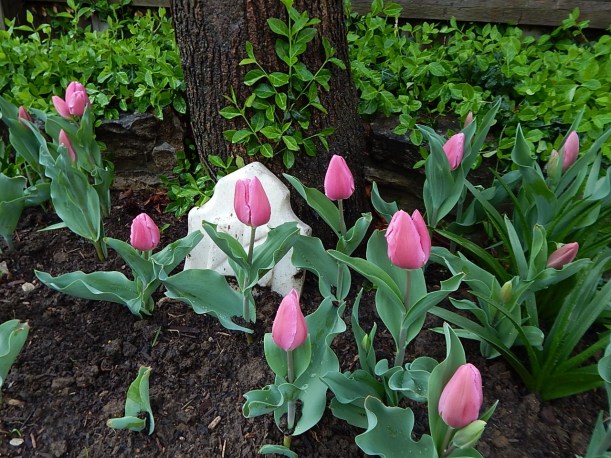
Pretty pink tulips in bloom. Fond reminders of a family trip to the Netherlands last fall.
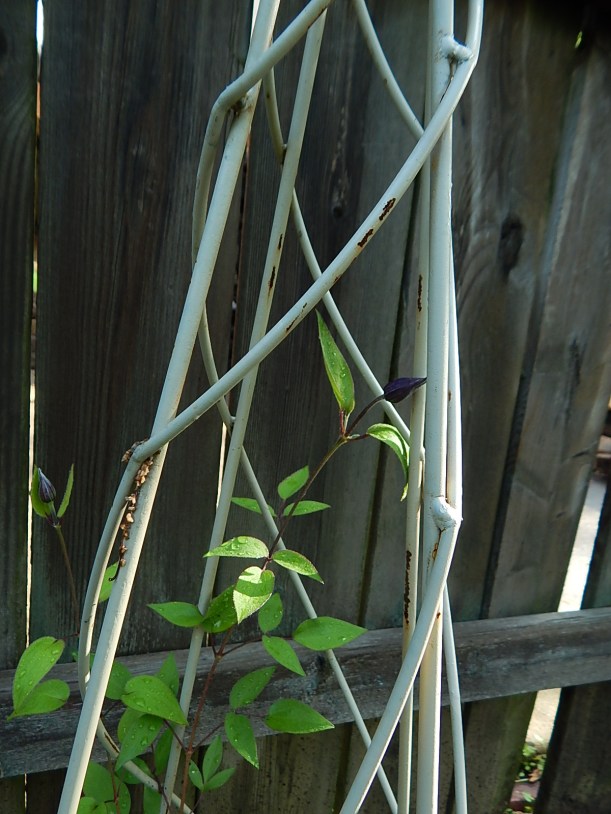
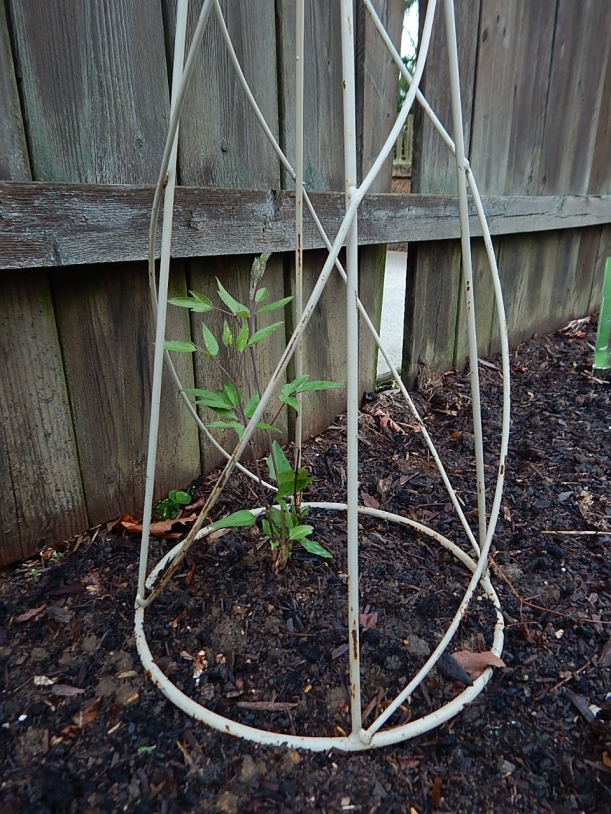
Clematis begins its winding growth. Transplanted in the fall from a container, it seems to like its new spot. This is the second year for this plant and I think I’m falling in love! 🙂
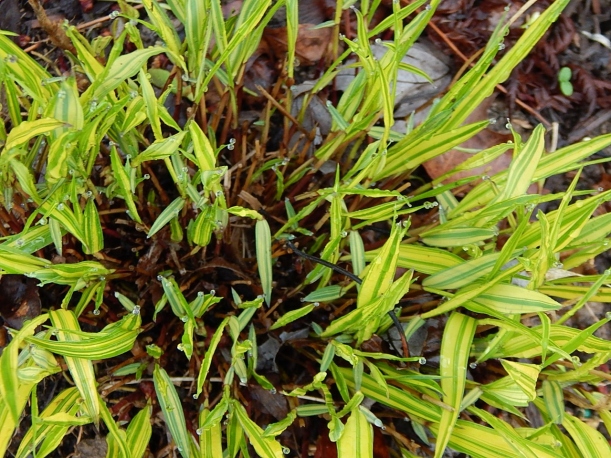
Bright chartreuse and green leaves of Japanese forest grass (Hakonechloa macra) after a rain.
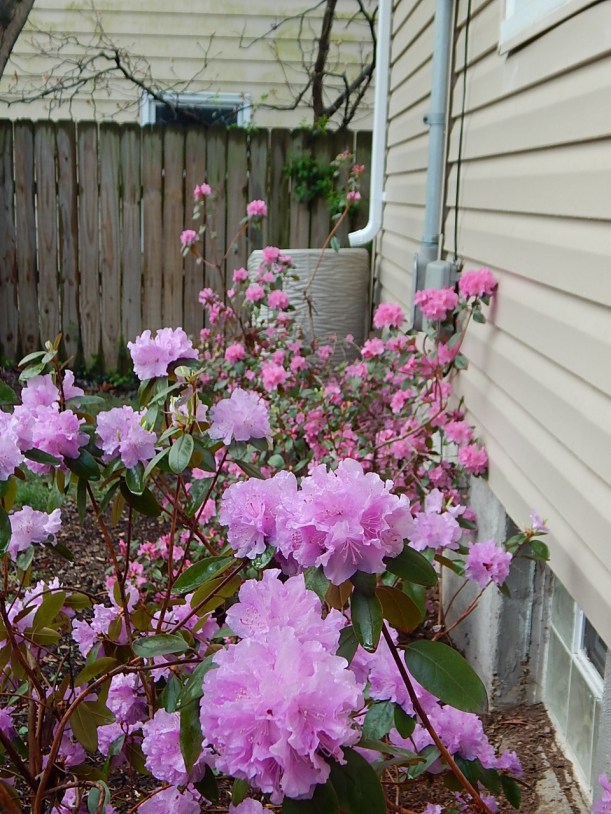
Pretty pink and purple rhododendron in full bloom. Note the rain barrel in the back. More about that in a coming post.
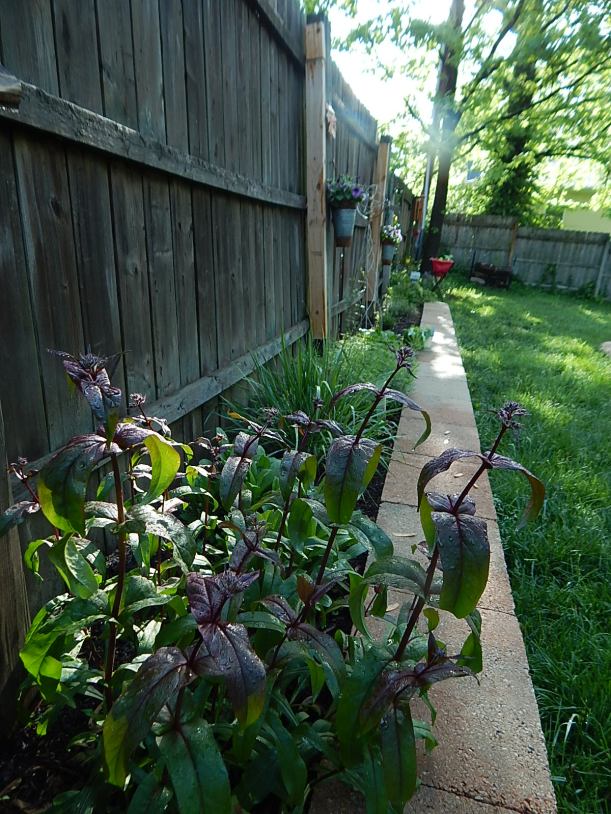
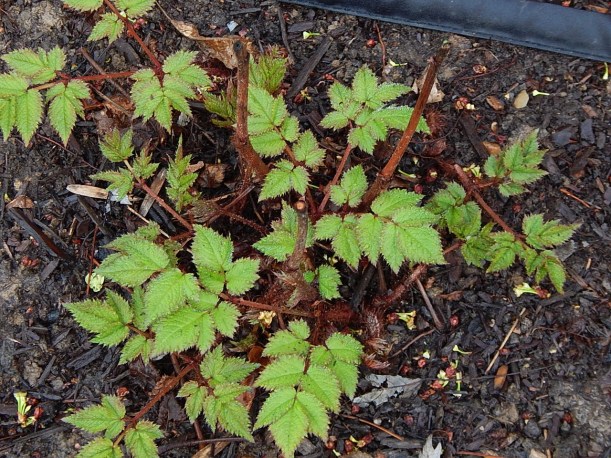
Husker Red penstemon (Penstemon digitalis) bursting forth. This is one of my favorites. I love the purple/green leaves with red veining. Before too long it will be in bloom.
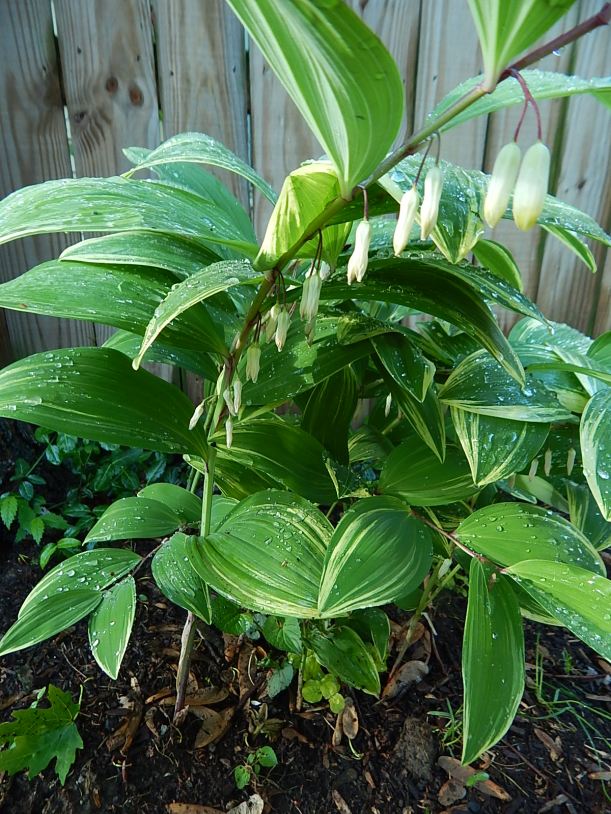
Hairy stemmed astilbe (Astilbe chinensis) are planted near the Japanese forest grass. But there are other signs of life in my shade garden: pointy tips of hosta emerging, curly coral bell (heuchera) leaves, rosy colored tips of Solomon seal (polygonatum biflorum), lemon-lime creeping Jenny (lysimachia nummularia), and soon, ferns, glorious elegant ferns.
The great seed planting experiment shows signs of life: cool season greens and brocolli.
Spring rainfall, cool night time temperatures and warmer days make possible all of the above.
I don’t know about you, but Pinterest has opened up my world. Many a winter evening was spent scanning through pin after colorful garden pin in search of inspiration for DIY ideas on garden beds, specific plants, pots, potting benches, fences, fertilizer, seed starting and more. The list goes on. With “Piddling Season” quickly coming to an end and the garden beginning to emerge, I thought, what the heck, let’s give one or two of them a try.
I’ve always shied away from starting seed indoors. Mostly, I don’t have a lot of indoor space and second, I don’t really have any equipment, such as a grow light. But every year after my fourth or fifth visit to the garden nursery, I tell myself that I’m going to save some money by starting seeds. But I never do.
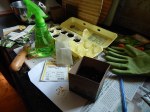
This year is different. I was given some seed packets…
And so it begins. A carton of eggshells fits my space limitations. My family room has lots of windows so I think I have plenty of light. By starting small, I may just get a taste of success.
While I have direct sewn lettuce, broccoli and spinach outside, I’m using eggshells indoors to start spinach, broccoli, basil and geranium seed. Apparently, you can plant the whole kit and caboodle; no need to discard the shell. Using a Sharpee, I marked each shell with the type of seed planted. Doing this experiment takes me back in time to 4th grade science experiments. Clearly, I’ve matured because I didn’t hate doing this.
Here’s the recipe for success:
Boil the eggshells to clean and sterilize. This only take a few minue. Then, punch a small hole in the bottom of the shell for dranage.
Next, fill with seed starting material. I used potting soil.
Add seed and cover with more soil. Here, I’m planting basil.
Mist to thoroughly moisten the material. I mist daily.
Place in a sunny window.
My Pinterest experiments won’t stop at eggshell seed starting. There’s a plethora of pins on using Epsom salts to boost plant growth. I need to research which plants like magnesium and sulfate, which, apparently is what Epsom salts are. And then there’s coffee grounds. My research on coffee grounds tells me not to put them directly into the garden as is sometimes extolled on Pinterest. They should be put into the compost pile because alone they are too acidic. And although I have seen lots and lots of pins extolling the virtues of burying banana peels in the garden by the roses, I’m not sure I’ll try that one either.
What Pinterest tricks have you tried in your garden?

 There’s nothing more annoying than when the hose springs a leak. Of all the many things I want to spend my garden bucks on, hoses fall to the bottom of the list. The last thing I want to do is go buy a new one. Fortunately, they are easy and inexpensive to fix. Before you get started, know if you need a male or female connector. You don’t want to have to make more than one trip to the hardware store.
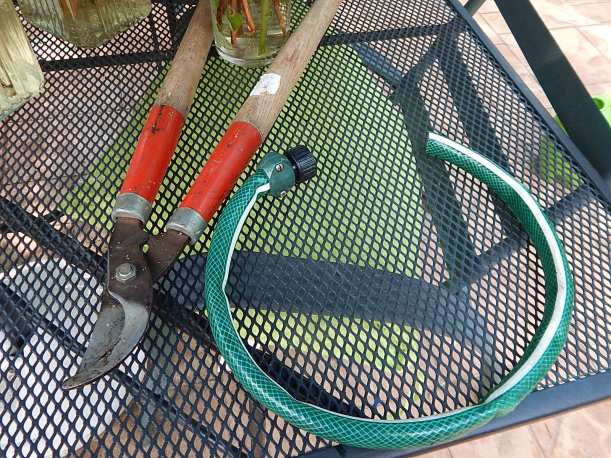 Step 1. Cut off the affected area. You can see that this hose has already been repaired once. In the spirit of recycling, I reused it when the hose sprung another leak. I use my lopers to easily cut through the hose.
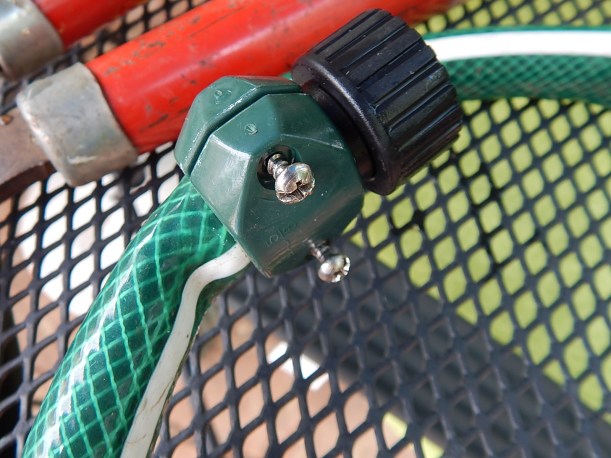 Step 2. Next, I remove the screws from the plastic clamp that keeps the hose end in place. Don’t lose the screws!
 The hardest part of the whole process is getting the repair kit hose connector out of the hose. I cut away at the outer sleeve of the hose, expose the rubber hose and cut that away as well.If you’re not reusing a repair kit, ignore this step and go strait to step 3.
 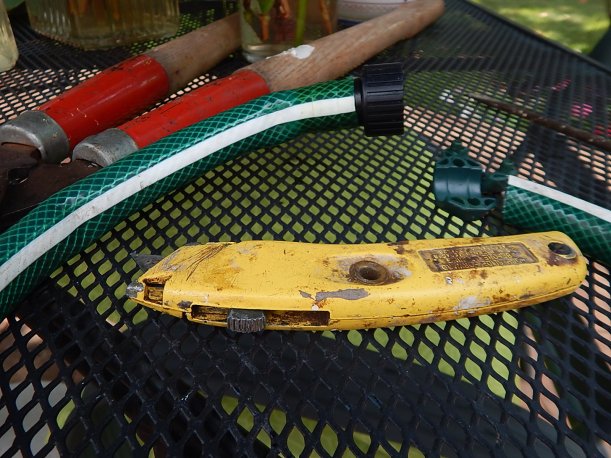 I use my trusty utility knife to do the cutting. Be careful and wear gloves so as not to inadvertently cut your hand.
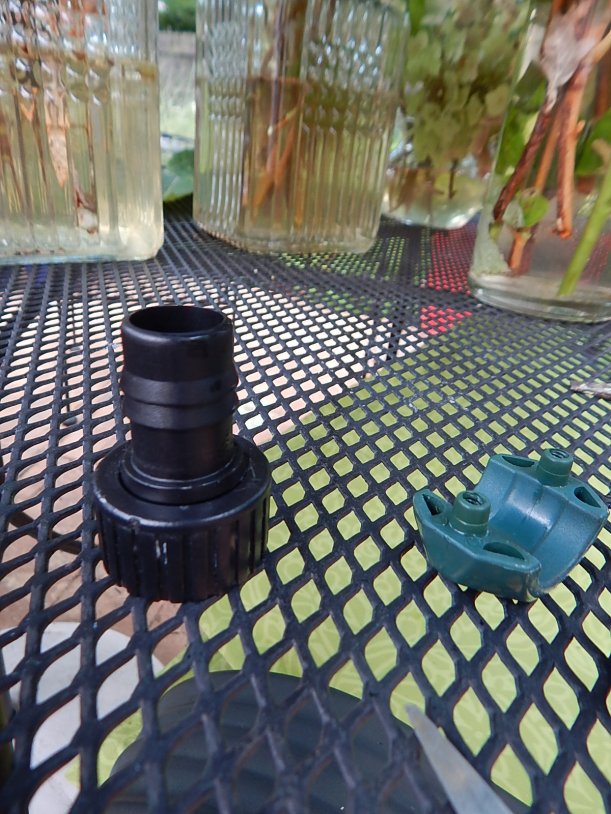 Step 3. Next, I pop off the hose connector and I’m ready to begin the repair, which will take no more than 2 or 3 minutes.
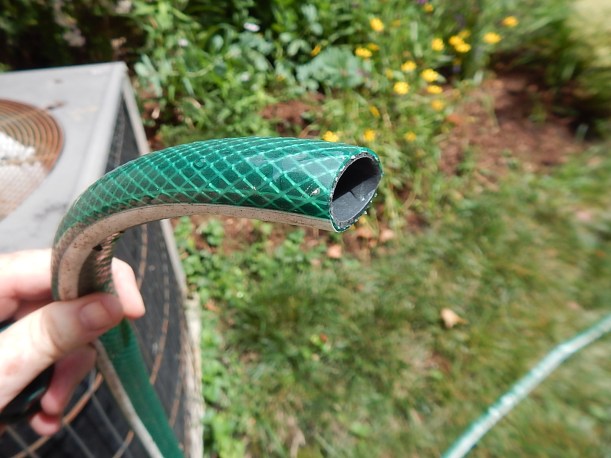 Step 4. Take the small end of the black plastic connector, push it into the hose and screw the clamp back on. Word to the wise, make sure you have the screws turned tight.
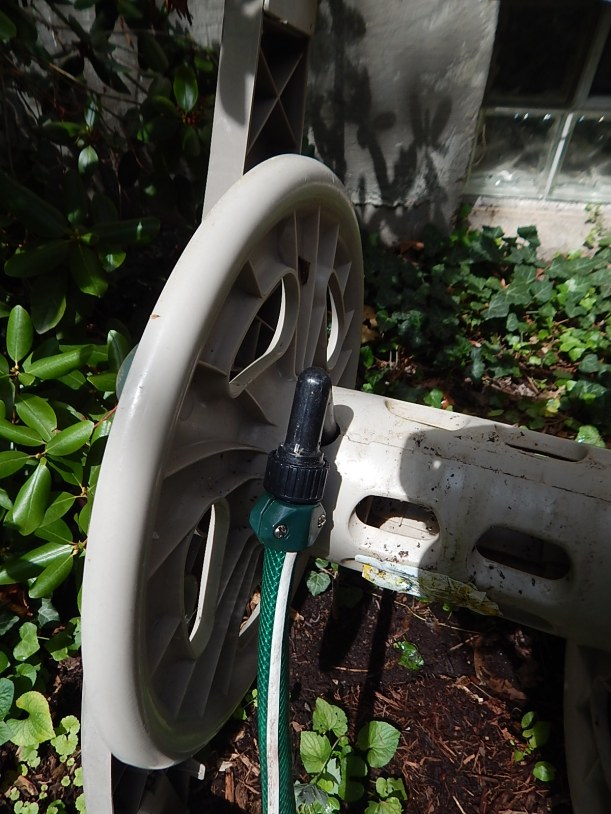 Step 5. Reattach the hose.
  Step 6. Voila! Back in business.
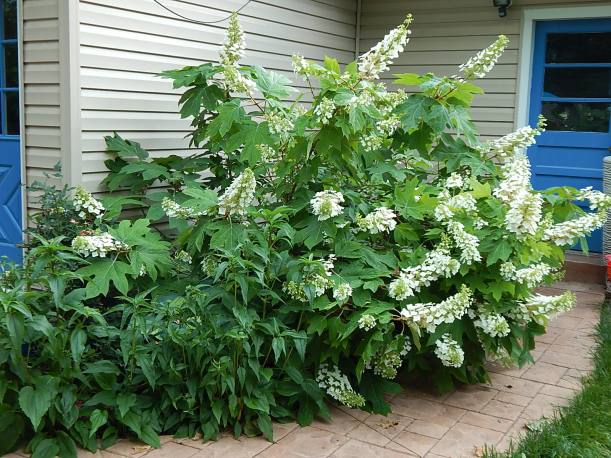
 Out popped the yellows as the month marched on. Stella d’Oro daylily and coreopsis began to bloom.


 Nicotiana. I plant this near a window so I can enjoy its evening fragrance. A fast grower, nicotiana attracts bees and likes sun. Nicotiana comes in pink, a limey green and white. I like the white but have planted all three. I don’t usually combine this in a container because it likes as much room as it can get.
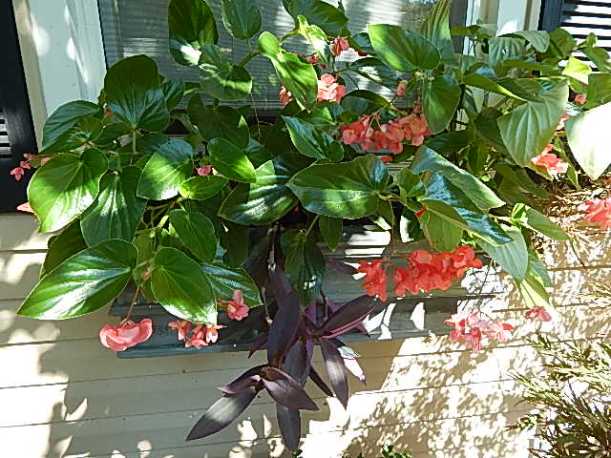 Begonia. Not just any begonia. It’s gotta be dragon wing begonia. The light my window boxes receive suits this plant just right, and dragon wing has become a staple. I usually pair them with a spiller because these plants are all the thriller I need! Here I’ve paired it with purple spiderwort, another easy grower. I’m partial to the coral blooms that gently cascade on a delicate stem. As you can see, they take over, but I’m not complaining.
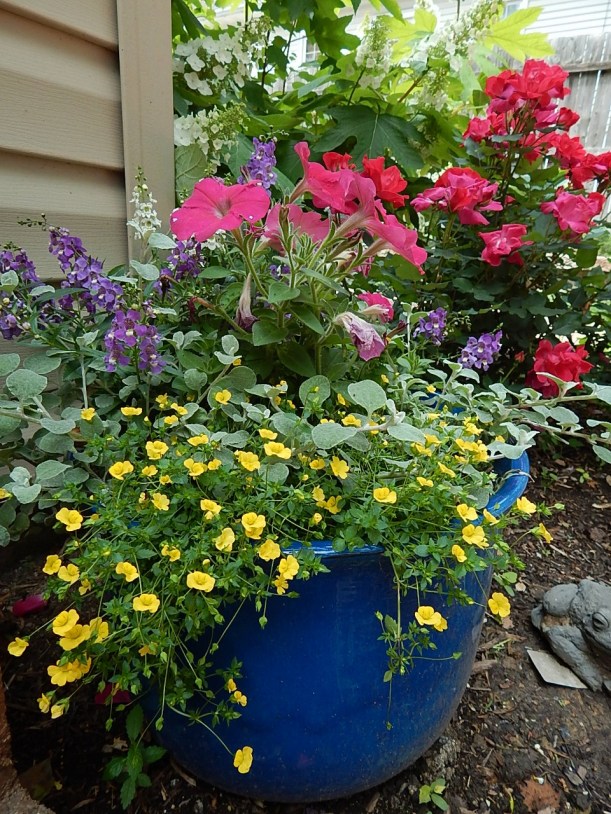 Angelonia. I’m fairly new to this gem of a plant and I find the white cultivars are a bit more vigorous than the purple. However, I’ve only planted these in containers for two seasons and last season my containers (which had the purple variety) really didn’t perform well. This container had both white and purple varieties. I adored the yellow accent of calibrachoa, but it only bloomed once and looked pretty shabby.
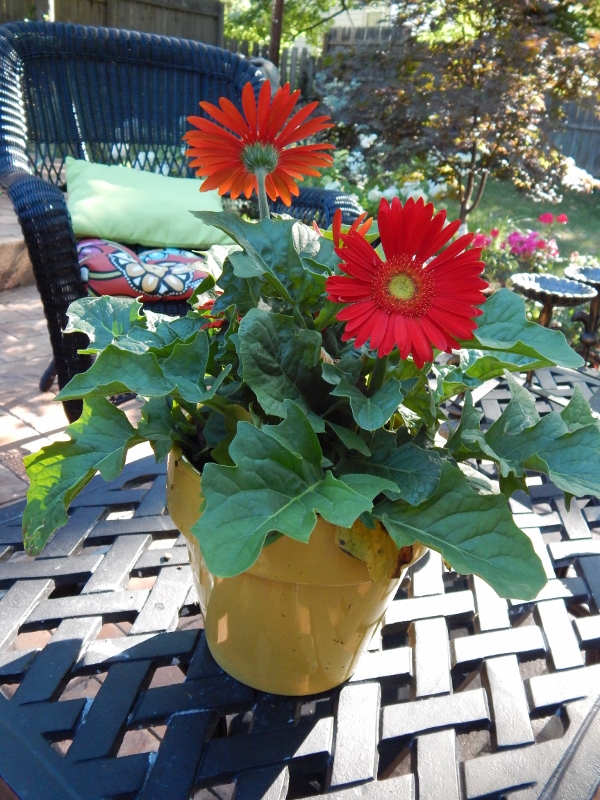 \
\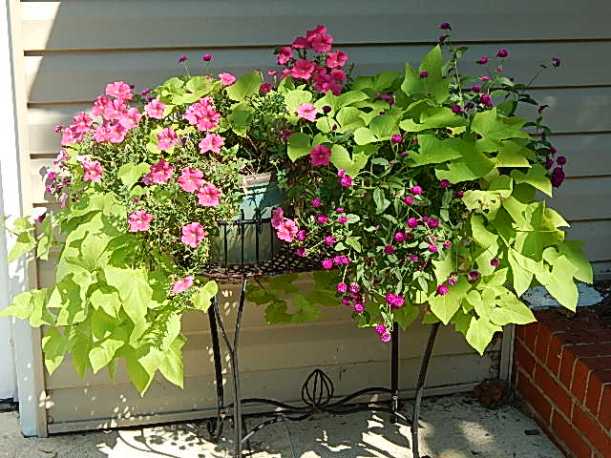 Gomphrena. I wish I had a better photo but you’ll get the idea. This is a real workhouse annual, providing bloom after tireless bloom all summer. Its cute pom-pom shaped spheres on long thin stems make for a great fill-in. I planted this last summer for the first time and combined it with sweet potato vine and petunias. I’d categorize this plant as fun, if there is such a plant category. The nearly neon purple bloom is a lot of fun too.
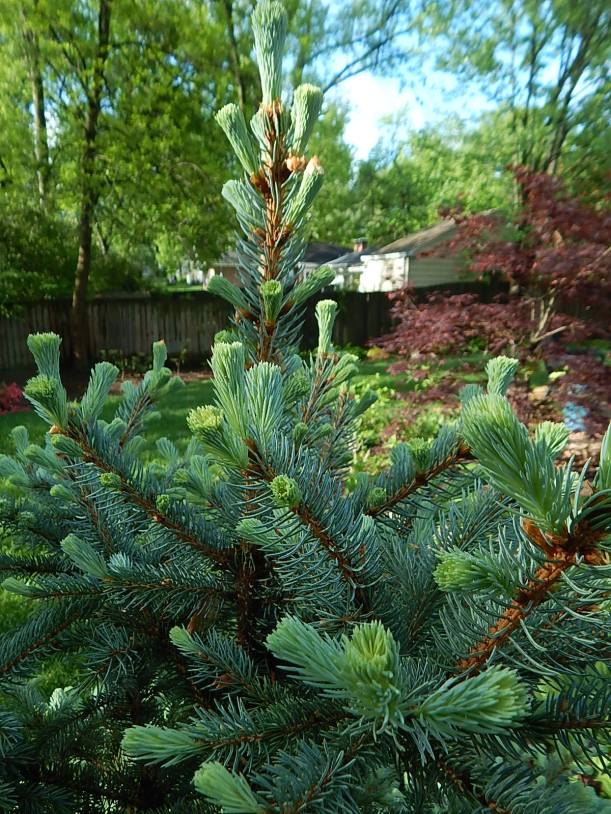


 This blog title pretty well describes my day yesterday. First, it was Friday. No explanation needed there. Even better, it was planting day.
")
")
 Here’s the lineup of what we’ve got going on. Many are
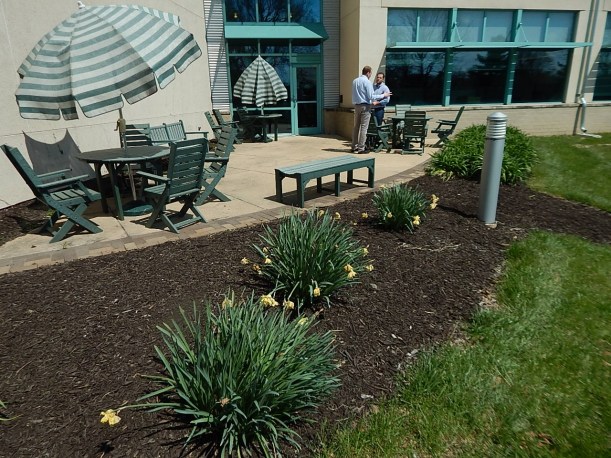

 I’ve embarked on a garden improvement plan, but then what gardener hasn’t? Tired of struggling with the slow fill in of the big bed that runs the length of the patio, I decided it needed some help filling in and plants weren’t going to do it.
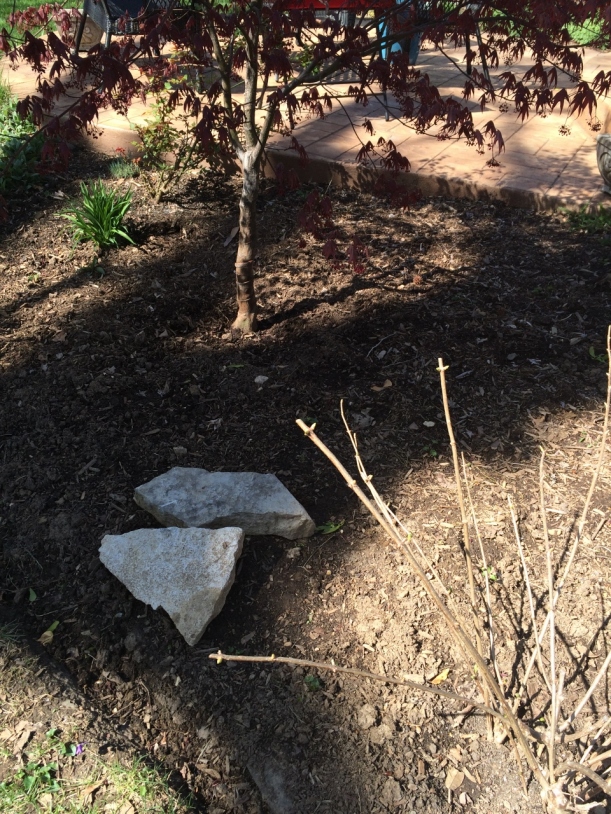 Suddenly I was left with lots of space around the tree. And I discovered two flagstone castoffs in the back of the yard. Well, you know the rest of the story. A quick trip to the nearby materials supply store and I was off to the races. Fortunately the ground is still soft and the soil is pretty good–not the rock hard, compacted clay I encountered when I started this bed in 2012.
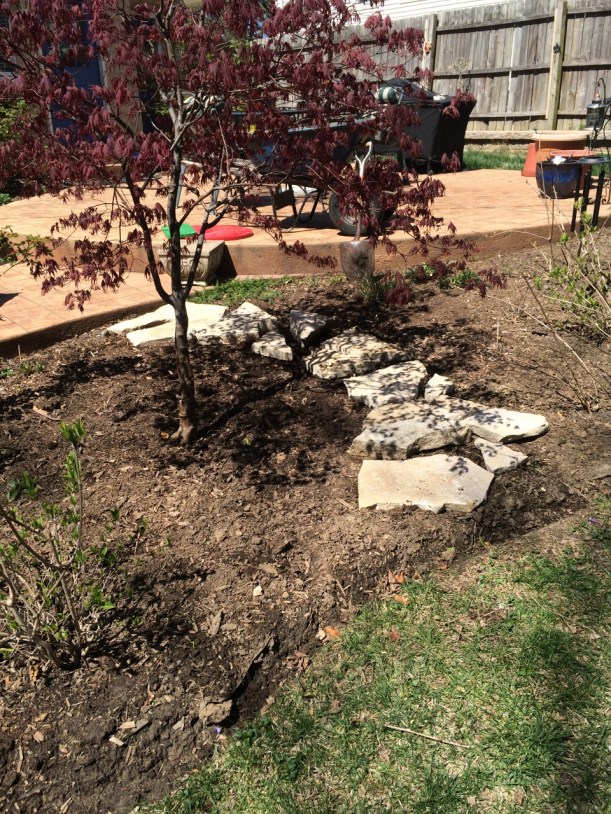


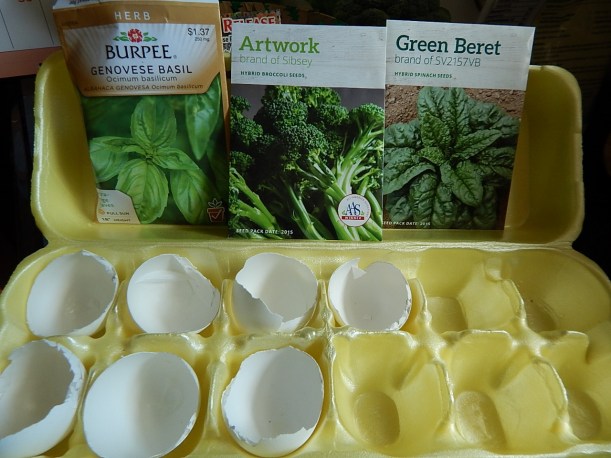 While I have direct sewn lettuce, broccoli and spinach outside, I’m using eggshells indoors to start spinach, broccoli, basil and geranium seed. Apparently, you can plant the whole kit and caboodle; no need to discard the shell. Using a Sharpee, I marked each shell with the type of seed planted. Doing this experiment takes me back in time to 4th grade science experiments. Clearly, I’ve matured because I didn’t hate doing this.
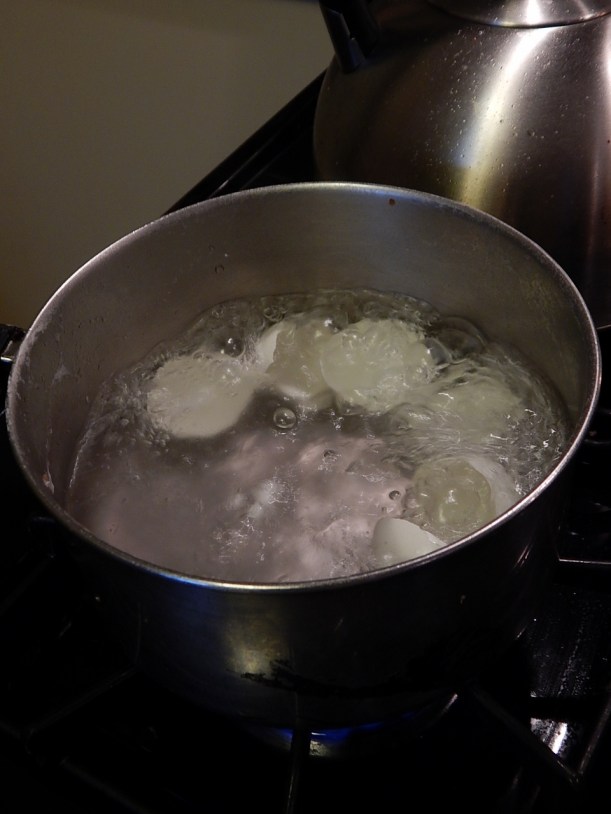
 Next, fill with seed starting material. I used potting soil.
 Add seed and cover with more soil. Here, I’m planting basil.
 Mist to thoroughly moisten the material. I mist daily.
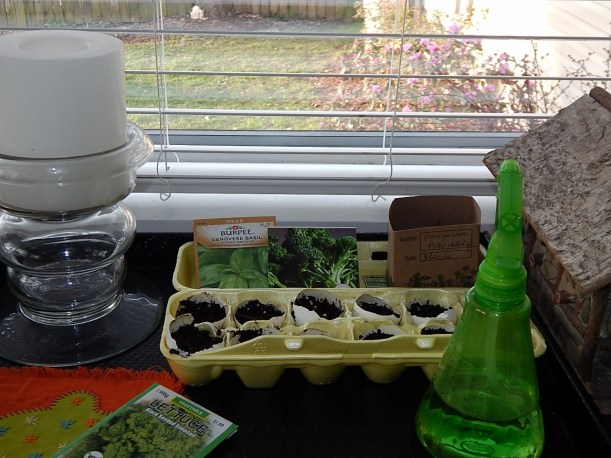 Place in a sunny window.