I take great in pleasure reading gardening blogs where I find kindred souls who also while away their winter doldrums by planning for spring, reviewing last year’s accomplishments and reading gardening books (no doubt for the delicious eye candy). Spring daydreaming finds me focused on two new garden bed projects I’m itching to dig into.
But I have gotten ahead of myself.
Autumn is where this story begins. Autumn in St. Louis is glorious. Hot, hot temperatures have eased, the humidity has backed off, and the season is long enough to enjoy the garden’s last hurrah. That is when I began preparing my two spring projects. Just enough was accomplished to leave me feeling satisfied that I could “put the garden to bed” for the winter. In fact, I highly recommend beginning the foundation of a project in fall because it gives us gardeners all winter to mull over plant selection, peruse Pinterest for great combinations and spend the dreary and dark cold winter thinking about the possibilities to come.
Raised Bed on The Sunny North Fence

With the railroad ties removed, I could create an entry that did not require visitors to take a very large step down into the yard. The square stones are the original patio repurposed. I will move them to the side yard where I store my pots and yard waste. I’ll install a rain barrel where the downspout is located.
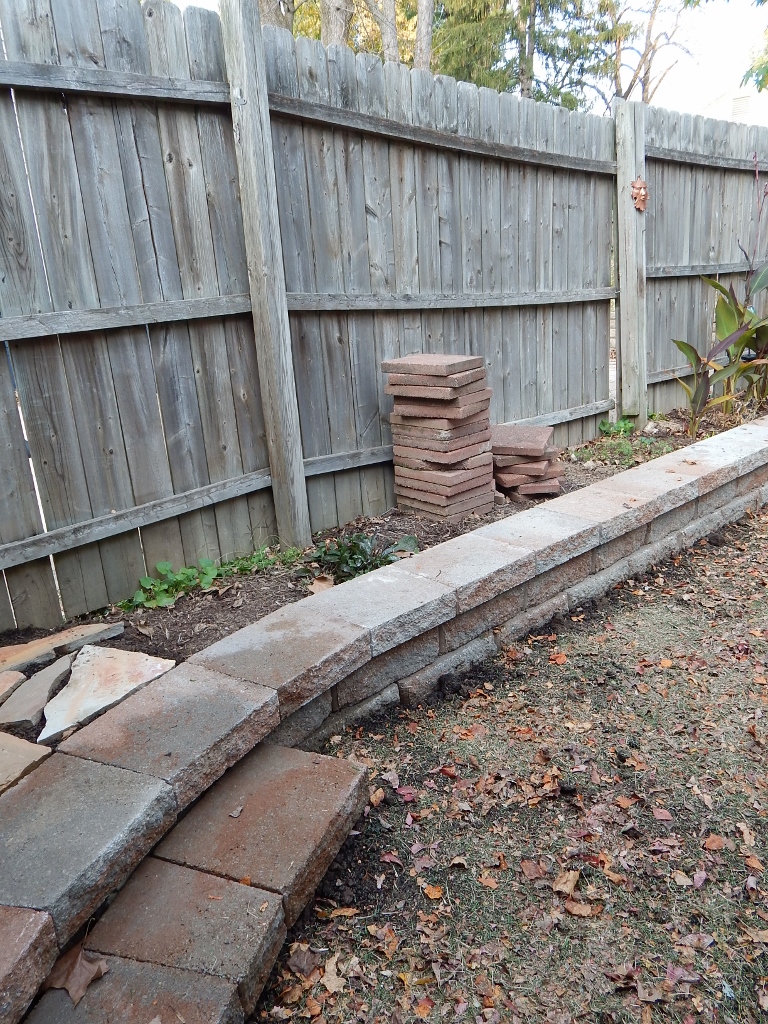
Project number one entailed replacing the rotting railroad ties that made this a bed, improving the entry into the yard from the gate, and adding more soil and grass seed to improve water flow. I selected a stone to tie into the patio but I am not entirely sold on its look. (I won’t get into the sordid details of my ugly complaint to the materials store, but let’s just say what was delivered didn’t exactly look like the materials on display.) But I think spilling plants will make me a true believer. This bed would be ideal for veggies, and I have dabbled in that area with limited success. The yard is Club Med for Squirrels and they have robbed me of any bounty tomatoes might bring. I’ve had limited success with peppers but always place herbs here. No, this sunny runway will be filled with florabunda. The great Canna Experiment took place in the raised bed last summer and I plan to install Canna 2.0 this year.
It’s often the unnoticed things that make a difference. I also added a lot more soil to the ground in front of the bed and reseeded. The season was getting late and I will probably have to add a little more grass seed in the spring. But the net effect is that rainwater will flow to the slope in the yard instead of just sitting there. A rain barrel is also in the planning. Not exactly what I want at the entrance to the yard, but I really like the sustainability aspects of the rain barrel and will somehow camouflage its unattractive exterior. I think they are making more options for barrels as well. This part of the story is to be continued.

The lower left is the step added to the wall at the entrance to the yard. I do like the curve. I placed flagstone pieces at the entry to create a sort of “landing” as you enter the gate.

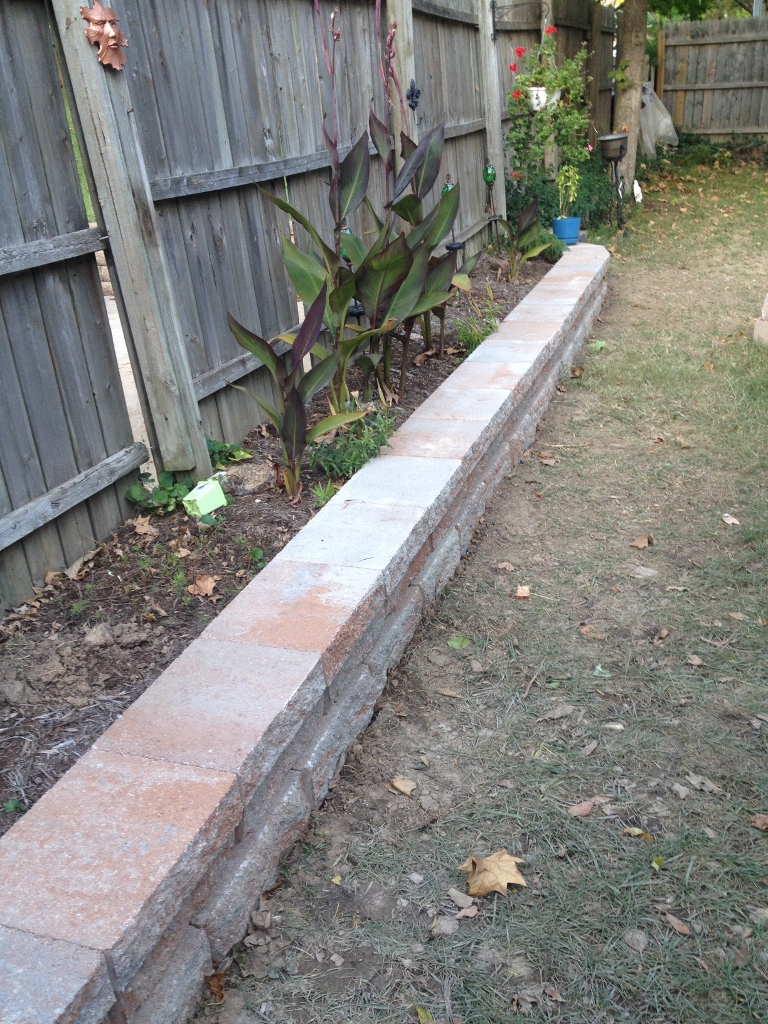
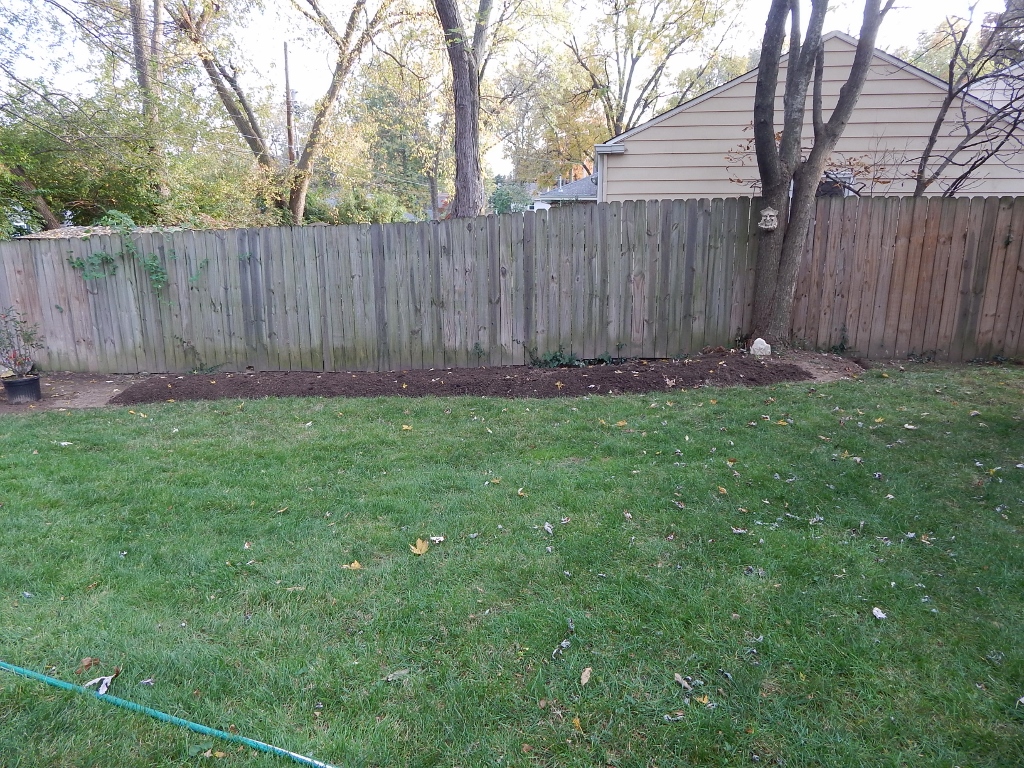
View of the length of the bed. This photo was taken from the gate. Most of my perennials were cut back or moved in the fall. The Great Canna Experiment though, required the leaves to get a healthy frost bite and die back before removing the canna.
The Shady South Fence
Directly opposite the North Fence is the South Fence which sits in shade. This, too, is a runway along the fence. However, it terminates at the pie-shaped wedge in the corner of the yard that has been my nemesis. When I first moved here in 2011, the wedge had 3 hosta in it. I added more hosta and azalea with an end goal of having large, hot pink azalea fill the back corner. That plan did not work as this area if draped in deep shade and part of its is the wettest spot in the yard…think standing water when it rains hard. Year 2 was spent coaxing the plants and adding plenty of mulch. Year 3 found me abandoning this bed completely.

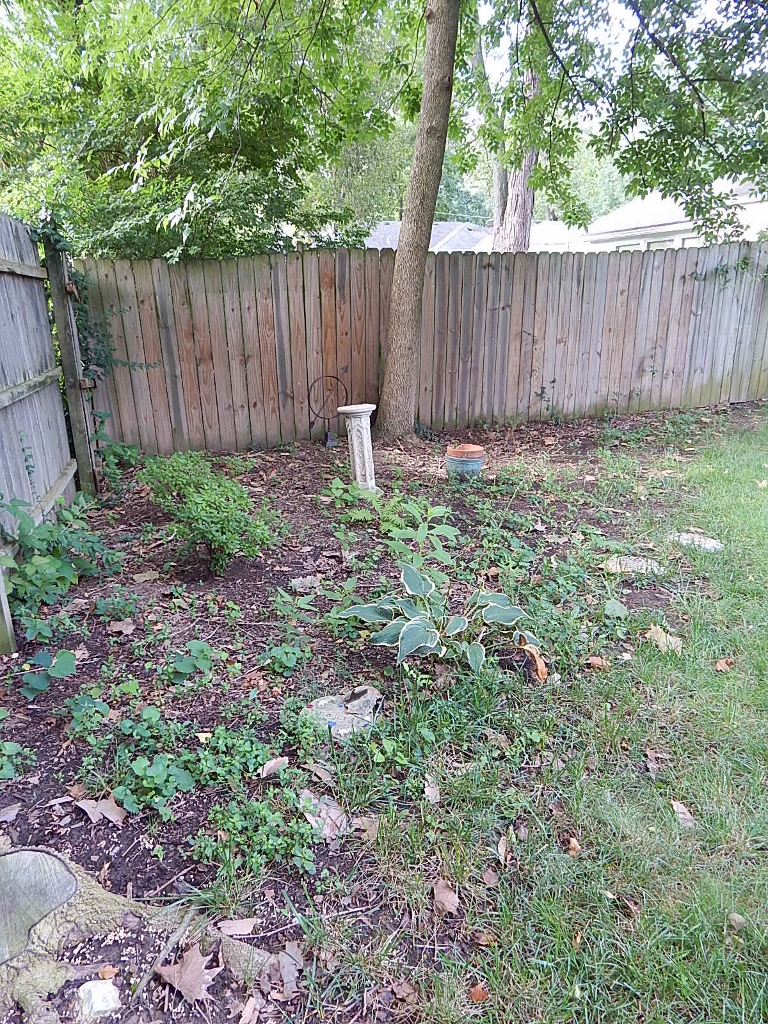
Oh so weedy, oh so neglected! I gave up the fight in the summer of 2014 only to resume the battle in the fall to make something of this difficult space.

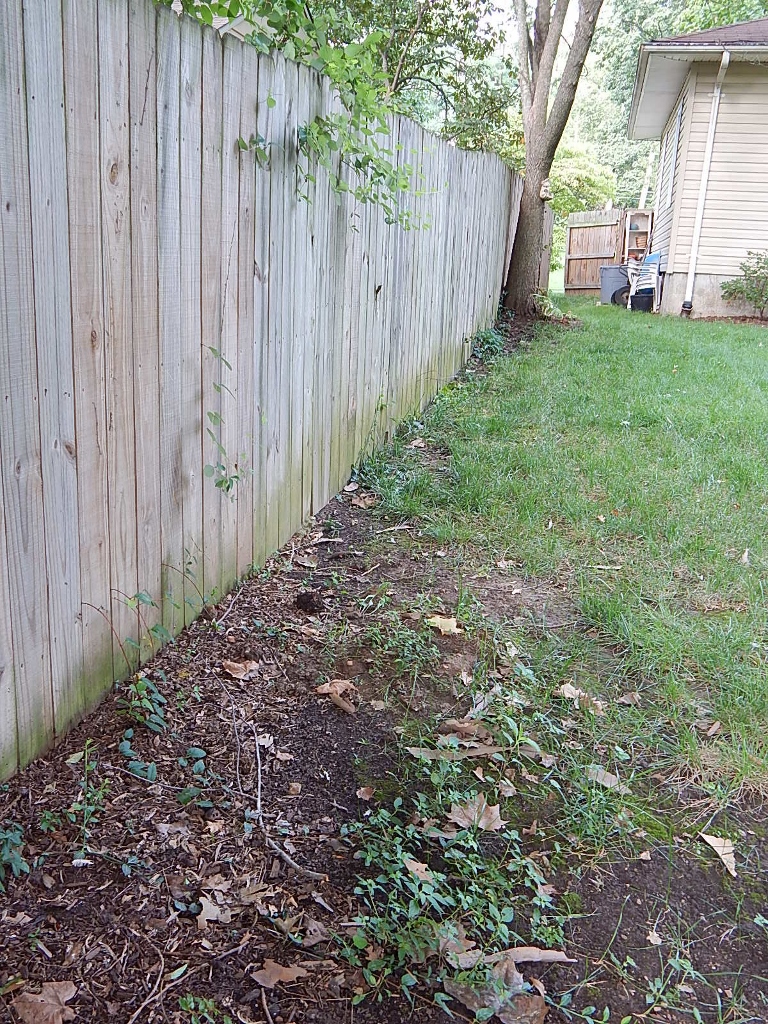
The wedge in transition. The azaleas have been moved to the front left. The winterberry on the far right has been planted and to the right of that is the edge of the new bed that runs the length of the fence line. There’s still work to be done but if this plan works out the shrubs will screen the corner. I may even use that space to place the wheel barrow and other garden tools.

The “before” glamour shot of the South Bed. At the bottom edge of the photo is where water pools after hard rains.

The new bed along the fence is waiting to be planted with shade lovers.
The new plan is all about creating a screen and involved moving the three remaining azaleas (rhododendron) to the edge of the the wedge where there is a bit more sun; adding three leatherleaf viburnum (Viburnum rhytidolphyllum) along the edge as they grow tall and fast; and putting in winterberry (Ilex verticillata) to wettest spot in the wedge.Now I only added one winterberry because this low, ponding area is where the deep shade begins. I will see how things go this summer but would like to add two more winterberry.
As for the shade-loving runway along the fence: That’s where the winter day dreaming comes in. Thank god for Pinterest, gardening magazines and blogs. My mind is filling with ideas hopefully to be realized in 2015.
What are your best bets for shade? Are there any tall shrubs that love shade and screen the dull gray fence?

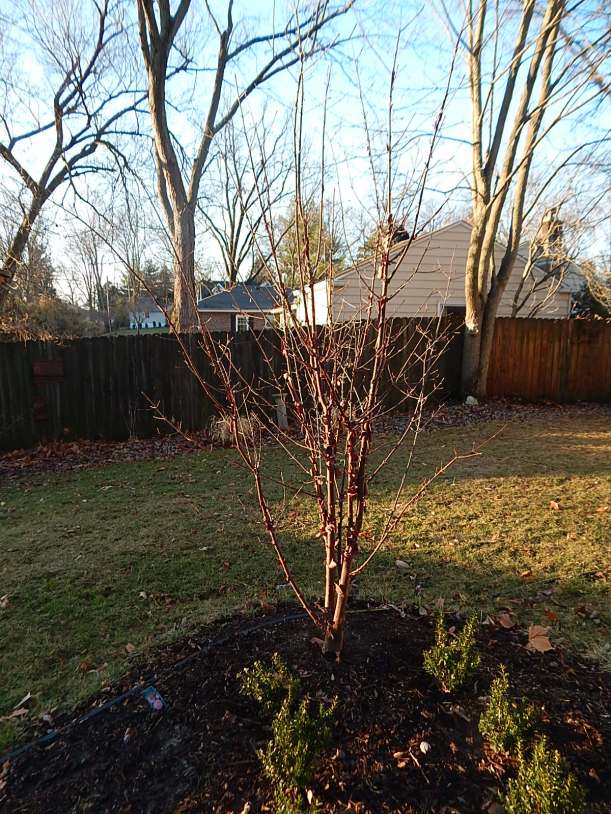


 When I bought the tree, the guy at the nursery told me they are slow growers and that it might take a few years for the tree to really exhibit the peeling bark feature.
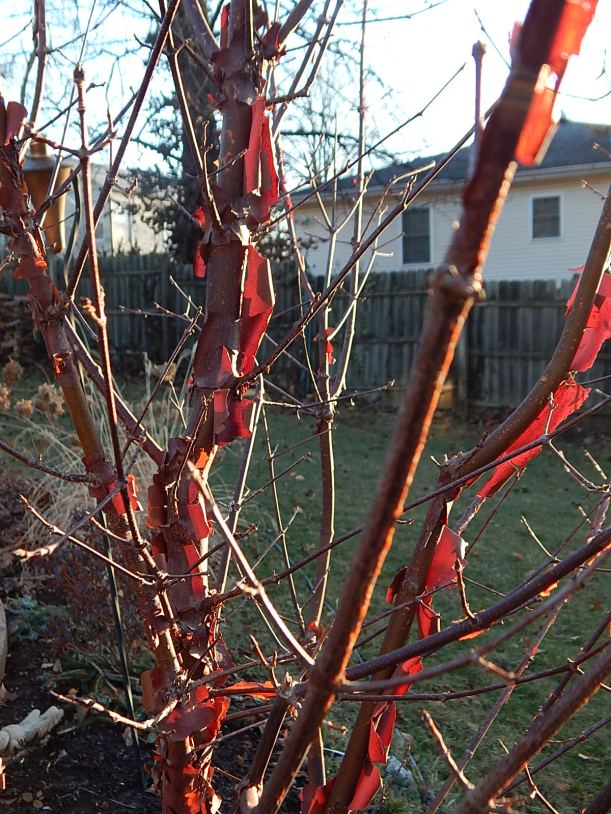
 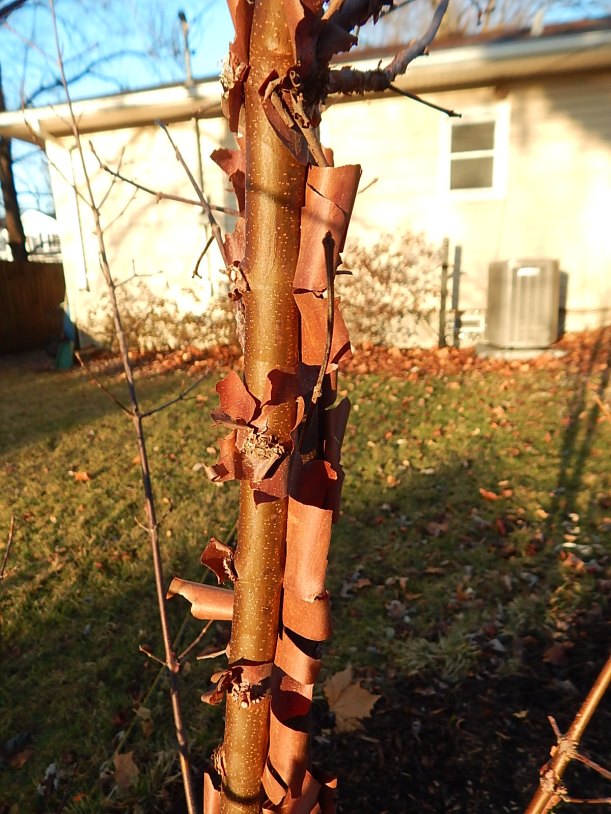 This is a view of the bark facing west with the sun at its back As you can see there is lots of peeling going on. What a cool tree.